Making a Glowing Alien Mirror Mask
The awesome Glowing Mirror Mask tutorial by Adafruit inspired me to make this Halloween mask. It still makes use of the infinity mirror efect. The main differences are the cool alien design and the fact the it’s printed on a transparency foil (not cut into vinyl).
Parts and Materials
All of the parts can be ordered from eBay or AliExpress.
- alien vector image (€9)
- 5V RGB individually addressable LED strip
- Wemos D1 Mini (I recommend to order at least two)
- Wemos battery shield
- 3.7V lithium battery with a connector
- male-male jumper cables
- breadboard
- shrink tubes
- holographic foil or paper
- one-way mirror foil
- silicone glue
- craft felt
- flexible strip
- adhesive tape
Required Skills
You should have these skills:
- using a breadboard
- soldering
- sewing
- programming the Wemos board using Arduino IDE (at least blink a led)
There are plenty of tutorials on these topics. You can learn these skills as you go but expect the project to take more than one weekend.
Tools
- soldering iron
- hot air gun, hair drier or lighter (for shrink tubes)
- hot glue gun
- needle and thread
- utility knife
- wire cutter
- scissors
Before you start with this project make sure you understand the risks of working with electronics and lithium batteries (they blow up if shorted!). The mask is not waterproof.
Flashing Wemos D1 Mini
We’ll be using the Wemos D1 Mini board for controlling the LEDs. I use this board for nearly every electronics project because it has a WIFI chip, mini-USB port and it’s very affordable.
Flash the Wemos using Arduino IDE. We’ll be using the Adafruit Neopixel library to control the LEDs. Start with this example code which loops between different effects. Make sure you edit the pin number and number of pixels in the strip.
A common pitfall in flashing the Wemos board is not having drivers for the USB to serial converter.
Light Up the LEDs
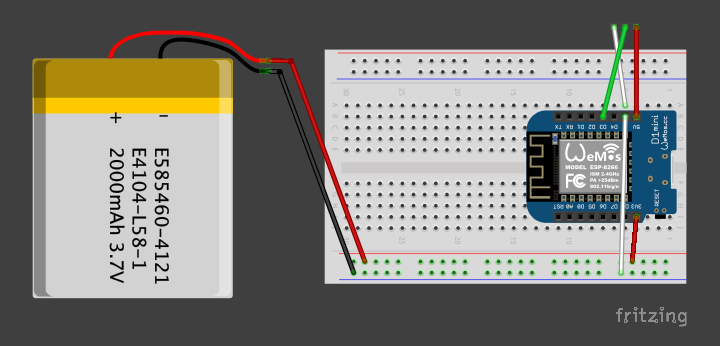
First, solder headers to the Wemos to make it breadboard-compatible. Then connect the LED strip according to the following diagram. You can power the Wemos directly through USB to save battery.
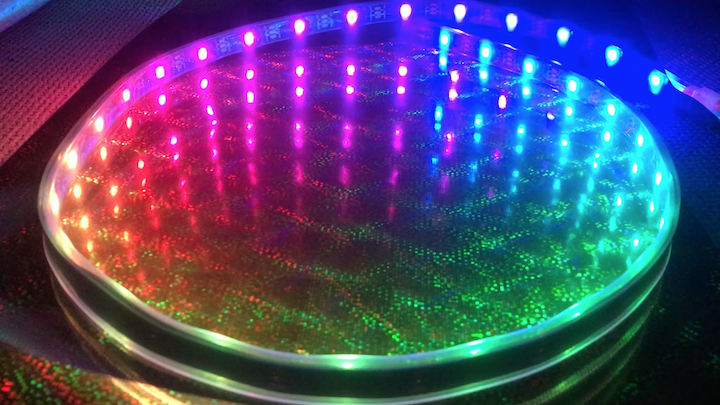 First test of the infinity mirror effect. Wow!
There might be 2 extra cables running from the LED strip. They are meant for external power supply. You don’t need them as Wemos has a 5V output. Make sure to isolate them though.
Choosing Design
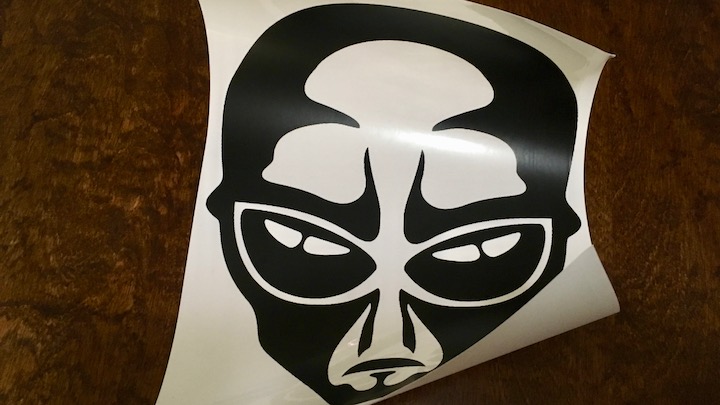
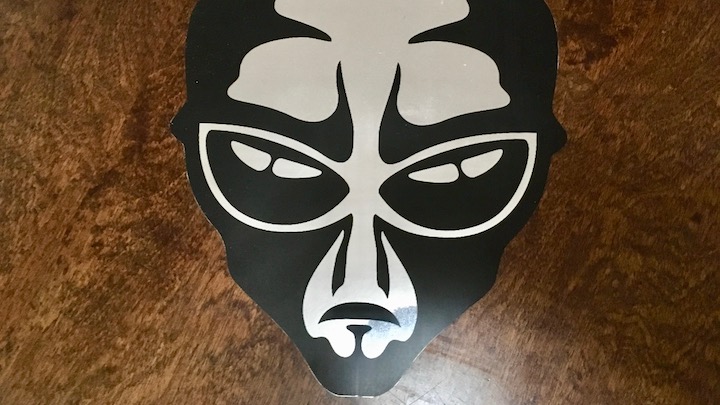
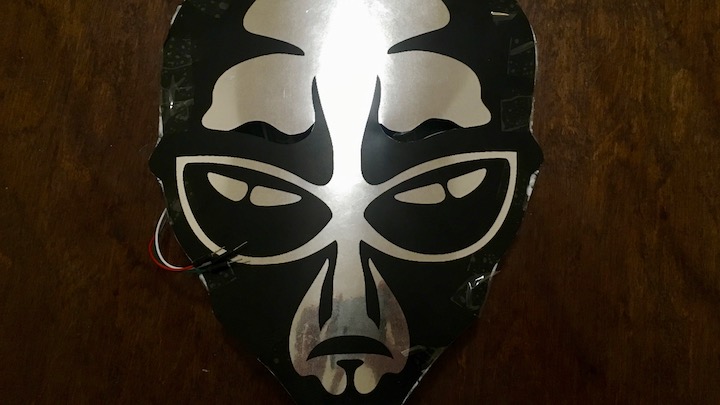
Now it’s time to choose a design for your mask. I’ve chosen this vector image because it has wide edges that perfectly hide the LEDs so they don’t shine directly in your eyes. I used the free SVG editor Inkscape to erase the background. The €9 price seems reasonable for the time it saved me. If you’re adventurous, make or buy a different design.
If you’re buying an image, use Google image search to see if there’s a better deal on another site.
Making the Front Layer
Print the mask on an A4 transparent self-adhesive foil. You can do this at home if you have a suitable printer and transparency foil. I had it done at a local copy centre. For an adult-sized mask, the A4 format is just wide enough. Make sure you crop the image as much as possible so that there are no margins on the sides. First, try printing the image on an ordinary paper if you don’t want to risk wasting a transparency foil.
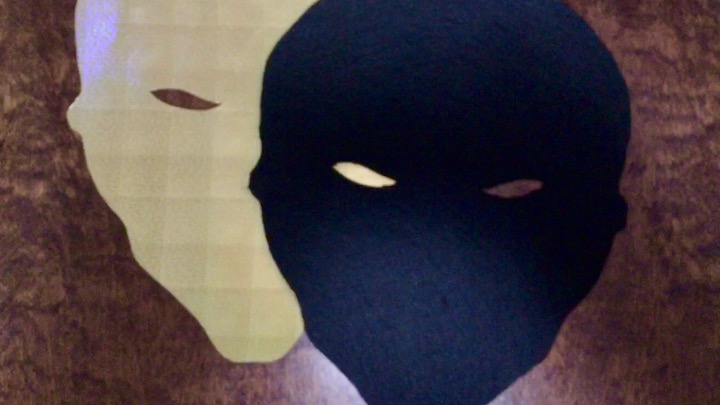
 This is how the image looks printed on a transparency foil.
Stick the transparency foil to the one-way mirror foil. First, peel the thin strip on the edge of the transparency foil. Align the two layers and carefully peel the rest of the sticker. Continuously apply pressure to avoid air bubbles.
Use a utility knife to cut out the mask.
 The front layer is ready.
Making the Back Layer
Use the front layer as a template to cut out the felt and holographic foil layers. Keep the felt left-overs. You’ll use them to cover the Wemos board later.
Use your hot glue gun to glue the two layers together.
I found out that the front layer should be slightly bigger than the back layer. The mask is going to be bent and the front layer would be stretched if we didn’t make it bigger. Trim the edges of the back layer based on how much you’re going to bend the mask.
Cut Out Holes for Eyes
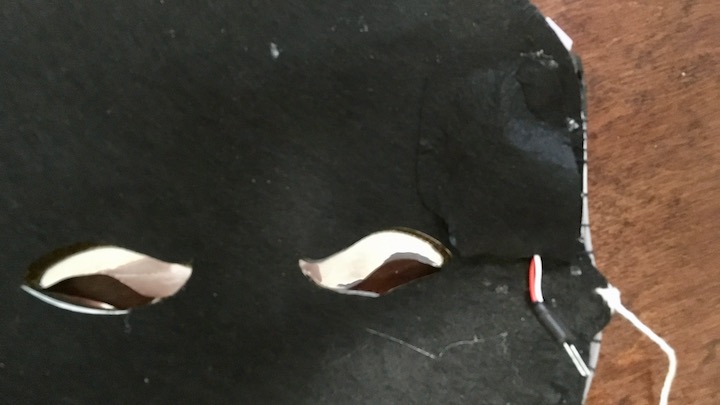
Cut holes for eyes through both the front and back layer. I’ve cut them above the “eyebrows” of the alien. I was afraid that the holes would look bad so I made them quite small. It doesn’t look bad at all and I should have made them bigger as it’s quite hard to see with the mask on. Make sure you can see clearly through the mask.
Attaching the LED Strip
Use tape to keep the mask bent. Sew the LED strip to the edge of the back layer. Leave a small margin between the LED strip and the edge so that the LED strip doesn’t slide off the back layer.
When you’re about to close the loop, cut off the excess of the LED strip using scissors. Make sure you cut the strip exactly in the marked area. Cut a hole for the connector and pull it through. Use jumper cables to connect your Wemos and check that everything is still working.
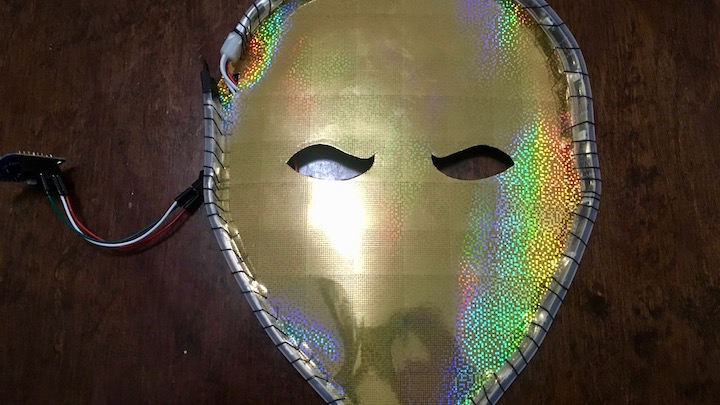 LED strip attached to the back layer.
Isolate the end of the LED strip using a shrink tube. Squeeze the end with pliers as in the picture below.
 Isolated end of the LED strip.
Attaching the Front Layer
Glue the front layer to the LED strip using silicone glue. Use tape to hold everything together. Wait until the next day to let the glue dry completely.
 You can see tape holding the mask together while the silicon glue dries.
Connecting the Board
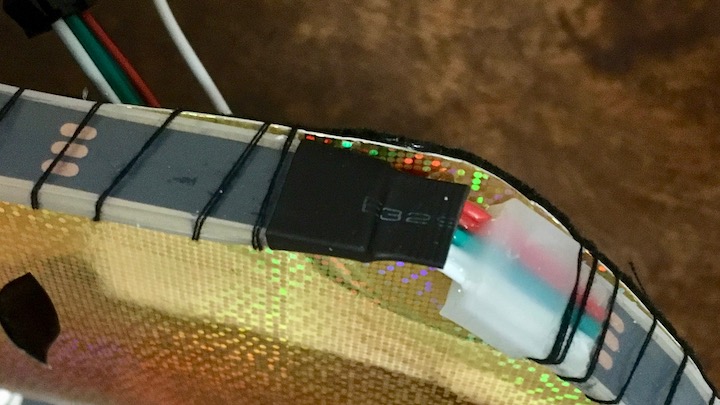
Solder cables according to the wiring diagram. Strengthen the connections using a hot glue gun. Don’t apply the glue to the board like in the picture (silly me), but rather glue the cables to the mask. This will relieve stress from the connections even better. Sew Wemos to the inside of the mask. Isolate the unused LED strip power cables if there are any.
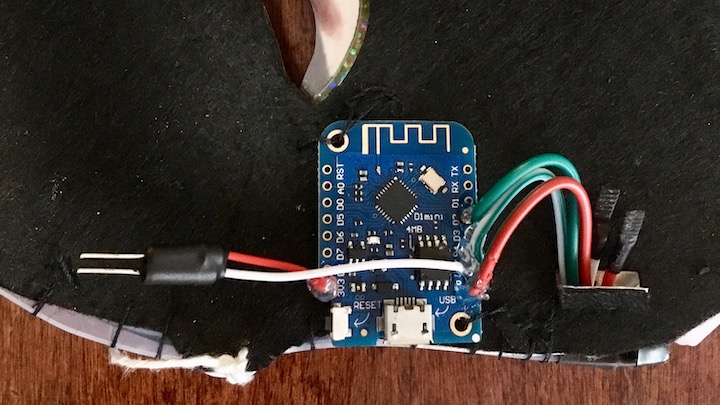 The Wemos board connected and sewn to the mask.
Charging the Battery
You’re going to charge the battery using the Wemos battery shield. Make sure you don’t connect the battery the other way around, otherwise you’ll burn the board and see the magic blue smoke.
Final Touches
Cover the Wemos with the left-over felt. Use hot glue gun to attach it. Allow for access to the USB port.
Sew a flexible strip to the mask and enjoy!
The next step might be building a web client for switching effects. It’s perfectly possible with the Wemos D1 Mini board and it would be cool to control the mask using a phone. Maybe next year. 🎃